
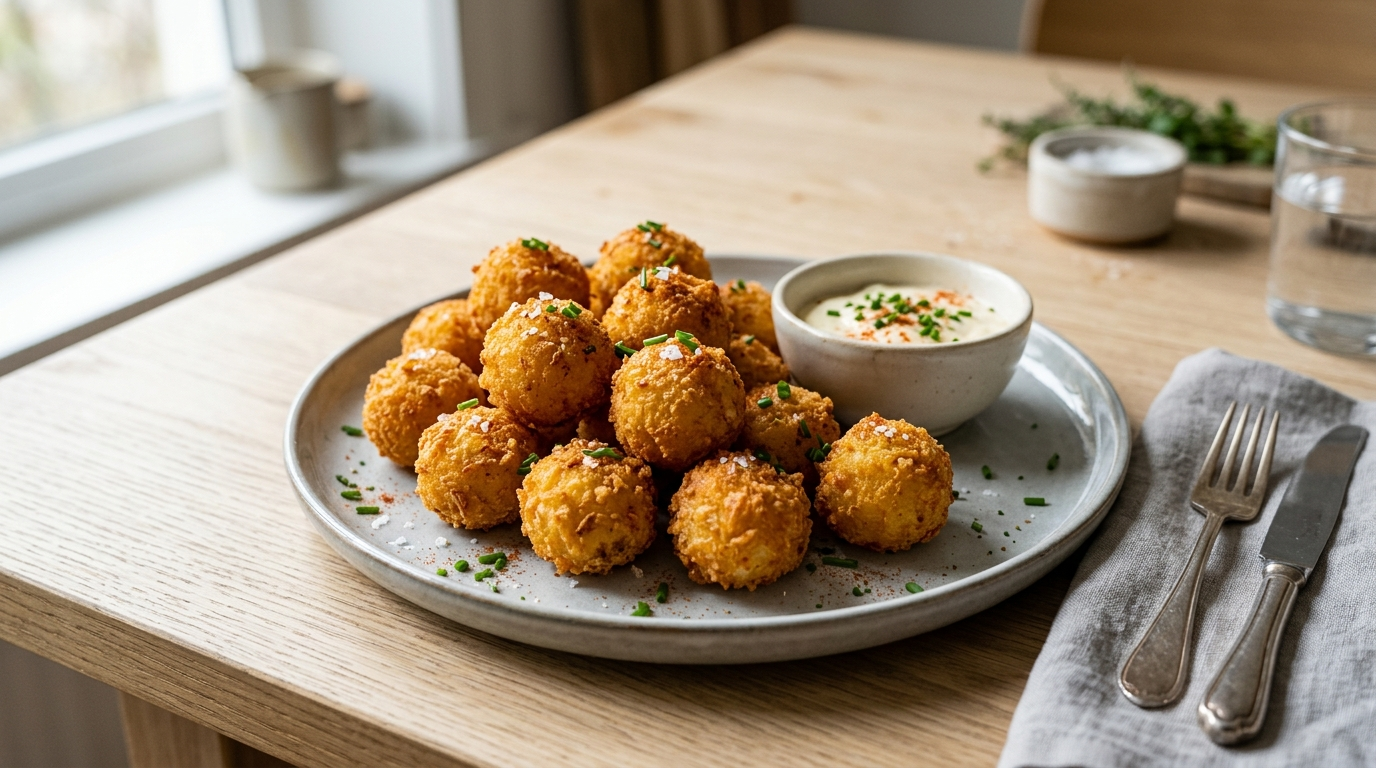
There’s something undeniably magical about that first bite of a perfectly crispy potato ball—the golden crunch giving way to a soft, pillowy interior that melts in your mouth. Maybe you’re scrolling through Pinterest at midnight, drooling over golden, crunchy snacks, and wondering if you can actually pull off something so delicious at home. Or perhaps you’re planning a party and need a crowd-pleasing appetizer that won’t leave you stressed in the kitchen. Either way, you’ve found exactly what you’re looking for.
Crispy potato balls are about to become your new favorite snack—and honestly, your new secret weapon for effortless entertaining. In this guide, I’m going to walk you through everything you need to know to create restaurant-quality potato balls right in your own kitchen. No fancy equipment, no hard-to-find ingredients, no complicated techniques. Just simple, straightforward steps that deliver incredible results every single time.
Whether you’re a seasoned home cook or someone who’s never fried anything in your life, this recipe is designed for success. So grab your apron, let’s get cooking, and prepare to fall in love with these golden little nuggets of joy.
What Exactly Are Crispy Potato Balls?
Let’s start with the basics so we’re all on the same page.
Crispy potato balls are bite-sized snacks made from mashed potatoes that are formed into balls, coated in a crunchybreadcrumb layer, and then fried until they reach that perfect golden-brown perfection. Think of them as the ultimate comfort food—crispy on the outside, creamy and smooth on the inside, with that satisfying crunch that makes you want to go back for seconds (and thirds).
These delicious little treats go by different names depending on where you are in the world. You might hear them called potato bites, crispy potato spheres, or even aioli potatoes in some restaurants. But no matter what you call them, one thing remains constant: they’re absolutely irresistible.
What makes potato balls so popular is their incredible versatility. They’re perfect as an appetizer when you’re hosting friends, a fun after-school snack for the kids, or even a satisfying late-night craving solution. You can keep them simple with just potatoes and seasonings, or get creative with cheese-stuffed variations, bacon bits, or even spicy jalapeño centers. The possibilities are genuinely endless, which is why this recipe has staying power in any kitchen.
Why This Recipe Works (The Secret to Ultimate Crispiness)
Alright, let’s talk about what separates a good potato ball from a truly extraordinary one. And trust me, after making these dozens of times, I’ve learned exactly what makes the difference.
The Double-Coating Technique
Here’s the game-changer: double coating. Most recipes call for a single dip in egg and breadcrumbs, but we’re going above and beyond. By rolling your potato balls in flour first, then egg, then breadcrumbs—and optionally repeating the egg and breadcrumb step—you create multiple layers of crunch that stay crispy long after they leave the oil.
This technique works because each layer serves a purpose. The flour creates an initial dry barrier that helps the egg adhere. The egg acts as the sticky glue that binds everything together. And the breadcrumbs? That’s your crunch armor. When you double up, you’re essentially creating a protective shell that stays crispy even when the interior cools slightly.
Cold Mashed Potatoes Are Your Friend
Here’s a tip that trips up many home cooks: don’t rush the cooling process. Using warm or room-temperature mashed potatoes might seem more convenient, but here’s what happens—they’re too soft and sticky, making it nearly impossible to form neat balls that hold their shape during frying.
Cold mashed potatoes are firm enough to handle, easy to shape into uniform balls, and they’ll hold together beautifully when submerged in hot oil. I always recommend making your mashed potatoes a day ahead and keeping them refrigerated overnight. If you’re in a hurry, pop them in the freezer for 20-30 minutes to speed things up.
Oil Temperature Matters More Than You Think
The difference between crispy potato balls and greasy, soggy disappointments often comes down to one thing: oil temperature.
Keep your oil between 350°F and 375°F (175-190°C). Too hot and you’ll burn the outside before the inside cooks through. Too cool and the potatoes will absorb too much oil, leaving you with a heavy, greasy result. A simple candy or deep-fry thermometer is your best friend here—it takes the guesswork out of the equation entirely.
Ingredients & Measurements
Before we dive into the step-by-step process, let’s get everything organized. Here’s what you’ll need to create the perfect batch of crispy potato balls:
| Ingredient | Amount |
|---|---|
| Russet potatoes (peeled and cubed) | 3 large (about 1 pound) |
| Salt | 1 teaspoon |
| Black pepper | ½ teaspoon |
| Garlic powder | ½ teaspoon |
| All-purpose flour | ½ cup |
| Large eggs (beaten) | 2 |
| Breadcrumbs (panko preferred) | 1 cup |
| Vegetable oil (for frying) | 3-4 cups |
| Optional: cheddar cheese (grated) | ½ cup |
| Optional: chives (freshly chopped) | 2 tablespoons |
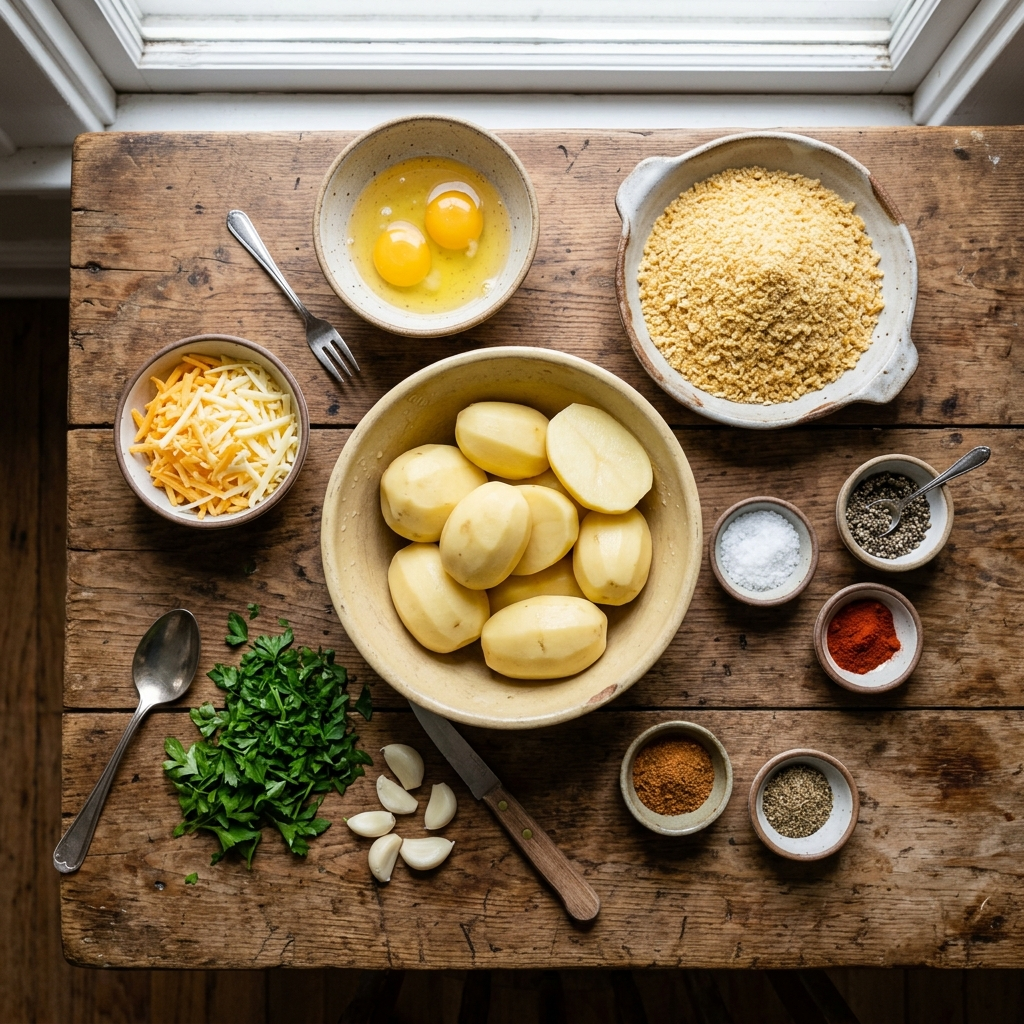
Why russet potatoes? These starchy spuds are ideal because they mash up fluffy and dry, giving you that perfect interior texture. Waxy potatoes like red or Yukon Gold have too much moisture—they’ll turn gummy instead of tender.
Panko breadcrumbs are worth seeking out if you can find them. These Japanese-style breadcrumbs are lighter and flakier than traditional breadcrumbs, which means they create an even crispier coating. If you can only find regular breadcrumbs, they’ll still work—just expect a slightly denser crunch.
Step-by-Step Recipe: From Potato to Perfection
Step 1: Prepare Your Potatoes
Start by peeling your russet potatoes and cutting them into roughly 1-inch cubes. This ensures they’ll cook evenly and quickly. Pop them into a large pot of salted boiling water and cook until they’re fork-tender—usually about 15-20 minutes depending on the size of your cubes.
Once they’re done, drain them thoroughly and return them to the hot pot. Let them sit for a minute to allow any excess moisture to evaporate. Then, mash away! You want smooth, lump-free mashed potatoes. A ricer or food mill gives you the best texture, but a standard potato masher works fine too.
Critical step: Let your mashed potatoes cool completely before moving on. I cannot stress this enough. Warm potatoes are sticky and difficult to work with. Cool potatoes are firm and cooperative. For best results, cover and refrigerate your mashed potatoes for at least 30 minutes, or even overnight.
While you’re waiting, go ahead and season your mashed potatoes with salt, pepper, and garlic powder. Give it a good mix and taste to make sure the seasoning is right.
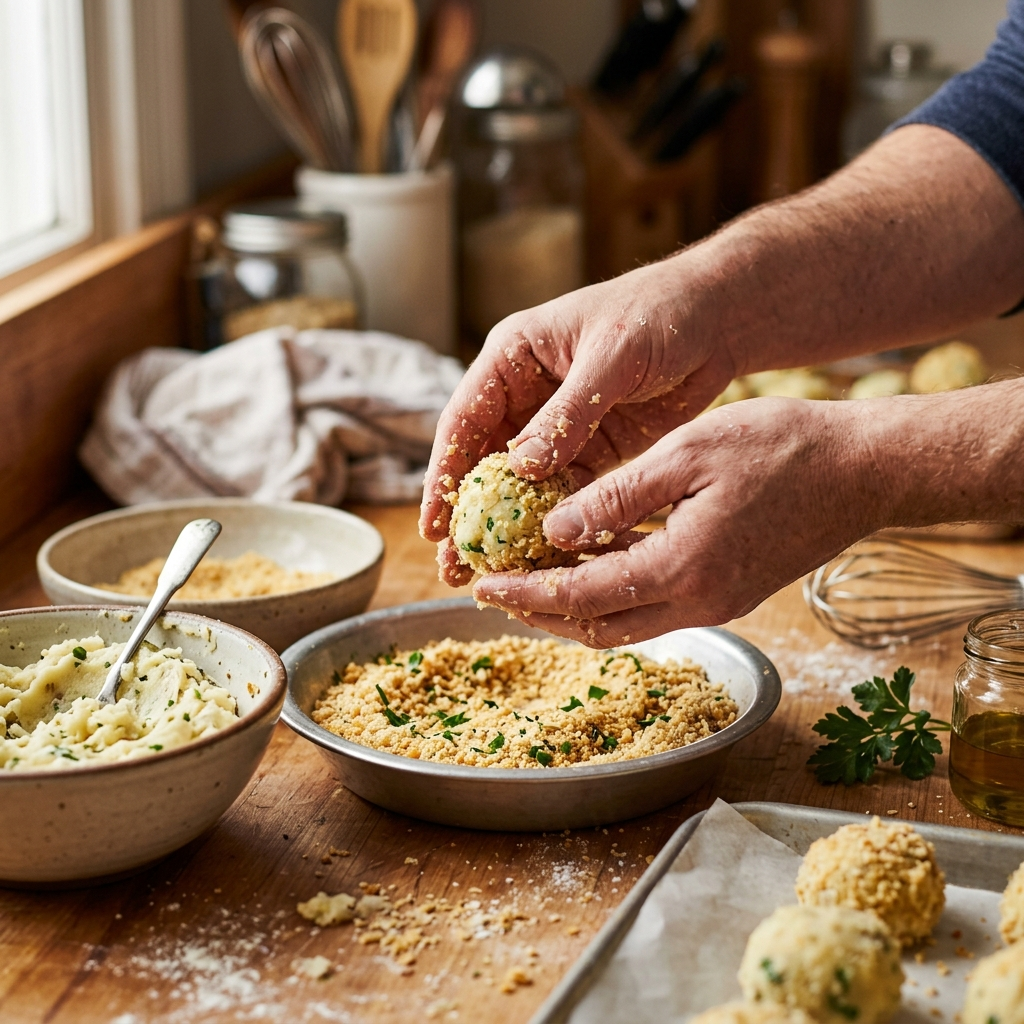
Step 2: Form Your Potato Balls
Now comes the fun part—shaping your potato balls. Using your hands, scoop about a tablespoon of mashed potato and roll it between your palms to form a smooth ball. Aim for about 1.5 inches in diameter—small enough to cook through evenly, large enough to satisfy.
Want to take it up a notch? Try adding a surprise cheese center. Simply flatten a small amount of mashed potato in your palm, place a cube of cheddar cheese (about ½ inch) in the center, and then wrap the potato around it, sealing the edges. This creates a delicious molten cheese center that oozes out with every bite.
As you form each ball, place them on a parchment-lined baking sheet. Make sure they’re not touching—you don’t want them sticking together. Once you’ve filled your baking sheet, pop it in the refrigerator for another 15-20 minutes. This firms them up even more and helps them hold their shape during frying.
Step 3: The Double-Coating Magic
Here’s where the magic happens. Set up your breading station with three shallow dishes:
- Dish 1: All-purpose flour
- Dish 2: Beaten eggs
- Dish 3: Breadcrumbs (plus a little salt and pepper mixed in for extra flavor)
Now, take each cold potato ball and roll it gently in the flour, making sure it’s lightly coated. Shake off any excess.
Next, dip it into the beaten egg, turning to coat completely. Let any excess egg drip off—you don’t want a soggy layer.
Finally, roll it in the breadcrumbs, pressing gently to make sure the coating adheres. Place it back on your baking sheet.
Pro tip: For maximum crispiness, repeat the egg and breadcrumb step one more time. Yes, it takes an extra minute, but that second layer of crunch is absolutely worth it.
Step 4: Frying to Golden Perfection
Heat your vegetable oil in a deep pot or Dutch oven to 350°F-375°F. You want enough oil to fully submerge your potato balls—about 3-4 inches deep should do it.
Carefully lower 4-5 potato balls into the hot oil at a time. Don’t overcrowd the pot! If you add too many at once, the oil temperature will drop, and you’ll end up with uneven cooking and soggy results. Better to work in small batches and be patient.
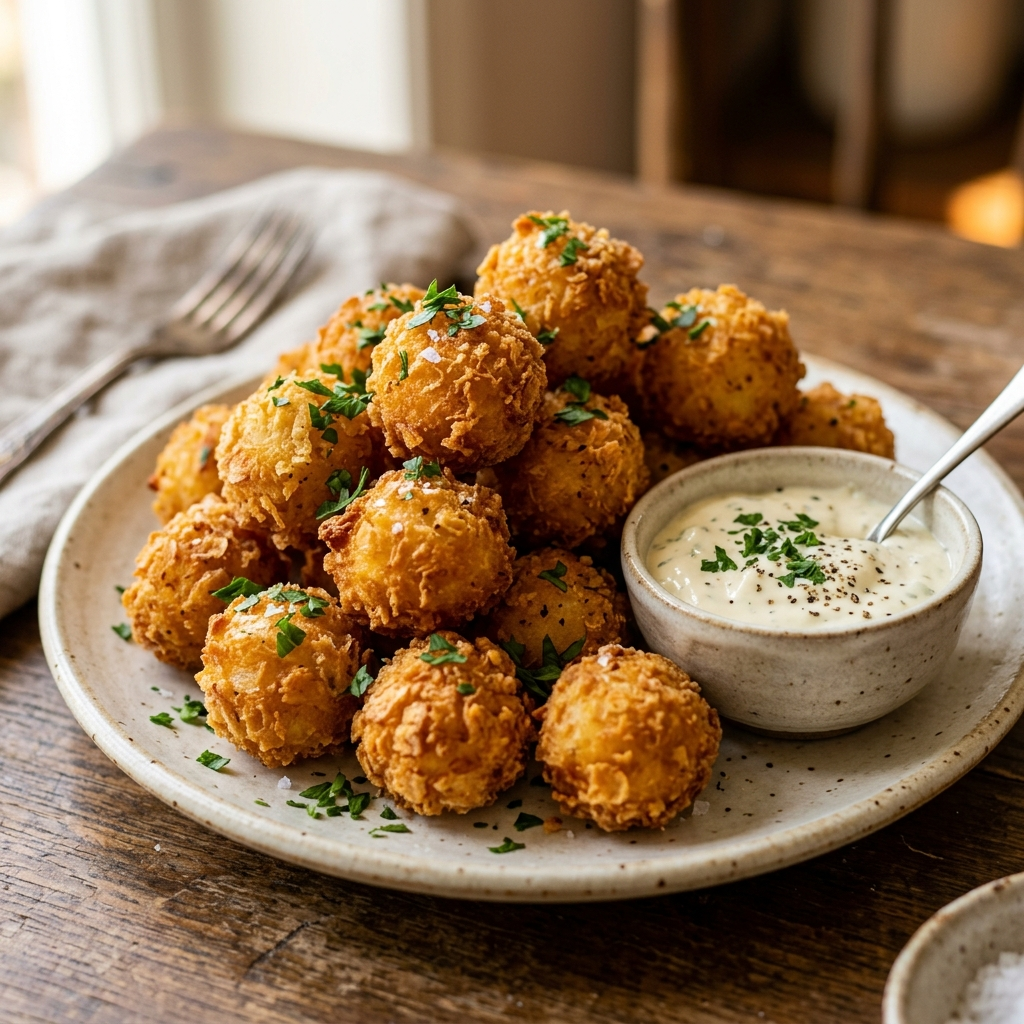
Let them fry for 2-3 minutes, turning halfway through with a slotted spoon or spider. You’ll know they’re done when they’re beautifully golden brown on all sides.
Remove them from the oil and place them on a paper towel-lined plate to drain. Immediately season with a pinch of salt while they’re still hot—this helps the seasoning stick and ensures every bite is perfectly seasoned.
Repeat until all your potato balls are fried. And yes, you’ll probably want to sample one or two (or five) straight from the pan. I won’t judge.
Pro Tips for Perfect Crispy Potato Balls Every Time
Alright, let’s talk about how to elevate your potato ball game from good to absolutely spectacular. These are the tips I’ve learned through trial and error, and they’re going to save you some frustration.
Use cold mashed potatoes. I already mentioned this, but it’s important enough to repeat. Cold potatoes are easier to handle, hold their shape better, and create a better texture in the final product. If you’re short on time, cook your potatoes ahead and refrigerate them overnight.
Don’t skip the resting time. After you shape your balls and after you coat them, let them rest in the refrigerator. This firms up the potatoes and helps the coating adhere better. Patience really pays off here.
Season every layer. Don’t just season the mashed potatoes—season your flour, add salt and pepper to your breadcrumbs, and finish with a final sprinkle after frying. Building flavor at every stage creates a more complex, satisfying result.
Make-ahead friendly. You can prepare uncoated potato balls and freeze them for up to a month. When you’re ready to eat, simply coat and fry them straight from frozen—no thawing needed. You’ll just need to add a few extra minutes to the cooking time.
Get creative with add-ins. While classic potato balls are delicious on their own, feel free to mix in shredded cheese, cooked bacon bits, chopped chives, or even jalapeños into your mashed potatoes for extra flavor and excitement.
Serving Suggestions & Dipping Sauces
A crispy potato ball on its own is a beautiful thing, but the right dipping sauce can take it to a whole new level. Here are some crowd-pleasing options:
Classic favorites:
- Ketchup—the eternal companion
- Marinara or pizza sauce
- Ranch dressing
- Creamy garlic aioli
Elevated options:
- Sriracha mayo for some heat
- Truffle aioli for a luxurious touch
- Honey mustard for a sweet kick
- Chimichurri for fresh, herby brightness
Fun serving ideas: Arrange your potato balls on a platter with small bowls of various dips in the center. Add a garnish of fresh herbs like chopped chives or parsley for a pop of color. This makes them party-ready and Instagram-worthy.
You can also serve crispy potato balls as a side dish alongside grilled meats, inside tacos or burritos, or even topped with pulled pork and BBQ sauce for an epic fusion snack.
Common Mistakes to Avoid
Let’s save you some headache by pointing out the most common pitfalls:
Using waxy potatoes. As mentioned earlier, russets are your best choice. Waxy potatoes have too much moisture and won’t get crispy.
Skipping the resting time. If your balls aren’t firm when they hit the hot oil, they’ll fall apart and create a messy situation.
Frying at the wrong temperature. Too cool = greasy. Too hot = burnt on the outside, raw on the inside. Aim for that 350-375°F sweet spot.
Underseasoning. Potato balls need salt! Taste your mashed potatoes before shaping—they should taste slightly too salty since the coating will mellow the flavor once fried.
Overcrowding the oil. This is the #1 mistake that leads to disappointing results. Give each ball enough space to fry properly.
Storage & Reheating Instructions
Got leftovers? Don’t worry—I’ve got you covered.
Refrigerator storage: Place cooled potato balls in an airtight container and store in the refrigerator for up to 3 days. Place a paper towel in the container to absorb any excess moisture.
Freezer storage: Freeze fried potato balls in a single layer on a baking sheet until solid, then transfer to a freezer bag. They’ll keep for up to 1 month. No need to thaw before reheating!
Reheating tips: For the best results, reheat in a 400°F oven for 8-10 minutes, or in an air fryer at 400°F for 3-4 minutes. This restores the crispy exterior without drying out the interior. Avoid the microwave—it will make them soggy and sad.
Pro tip: If you’re reheating from frozen, bump the oven temperature to 425°F and cook for 12-15 minutes.
Frequently Asked Questions
What type of potatoes are best for making crispy potato balls?
Russet or Idaho potatoes are ideal because they have a high starch content and low moisture, which creates fluffy interiors and crispy exteriors when fried. Avoid waxy varieties like red potatoes, as they’ll turn gummy instead of light and fluffy.
Can I bake crispy potato balls instead of frying them?
Absolutely! Preheat your oven to 425°F and bake on a parchment-lined baking sheet for 20-25 minutes, flipping halfway through. They won’t be quite as crispy as fried versions, but they’ll still be delicious and much lighter.
Why aren’t my crispy potato balls staying together?
This usually happens when the potatoes are too warm or too moist. Make sure your mashed potatoes are completely cool before shaping, and consider adding a tablespoon of cornstarch to help bind them together.
How do I keep potato balls crispy after frying?
Serve immediately for the best texture. If you need to hold them before serving, place them on a wire rack (not paper towels) in a warm oven at 200°F. The wire rack allows air circulation and prevents the bottom from getting soggy.
Can I make frozen crispy potato balls in an air fryer?
Yes! Cook frozen balls at 400°F for 10-12 minutes, shaking the air fryer basket halfway through. You’ll get crispy results without any oil.
Conclusion
You now have everything you need to create crispy potato balls that will wow your family, impress your friends, and satisfy every snack craving that comes your way. The secret is simple: use cold mashed potatoes, double-coat for maximum crunch, and fry at the right temperature. That’s it.
This recipe isn’t just about making a delicious snack—it’s about gaining a versatile kitchen skill that serves you in countless situations. Parties, game nights, busy weeknights, cozy weekends—crispy potato balls are always appropriate, always welcome, and always delicious.
So what are you waiting for? Get in the kitchen, get your hands in that potato, and start rolling. Your perfectly crispy, golden, absolutely irresistible potato balls are just a few steps away.
Now it’s your turn—head to the kitchen and try this recipe. Once you’ve made your first batch, come back and tell me: What’s your favorite dipping sauce? I’m genuinely curious to know how you like to enjoy your crispy potato balls.
And if you loved this recipe (and I really hope you do), save it to your Pinterest board so you can find it easily next time you need a crowd-pleasing snack. Share it with your friends who love easy, delicious recipes. And most importantly—get cooking!


