
There’s something incredibly frustrating about scrolling through delivery apps at 6 PM, watching the minutes tick by while you wait for food that will arrive lukewarm, soggy, and significantly lighter in your bank account than you expected. You’ve been there. We all have. That moment when you think “there has to be a better way” — and honestly, there is.
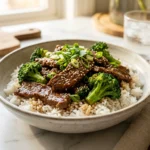
What if I told you that you could have a restaurant-quality Korean beef bowl sitting on your dinner table in less time than it takes for your favorite takeout place to even confirm your order? This dish delivers that sweet, savory, slightly smoky flavor you Crave from your favorite Korean BBQ restaurant, but you make it yourself with ingredients you probably already have in your pantry. No fancy equipment required. No waiting for the delivery driver. Just you, a hot skillet, and one incredibly satisfying meal.
Let me walk you through everything you need to know to make this your new weeknight staple.
Why This Korean Ground Beef Bowl Will Become Your New Weeknight Go-To
Here’s the thing about this recipe: it respects your time. Most evenings, you don’t have hours to spend marinading meat or preparing elaborate side dishes. You want something that tastes incredible without demanding your entire evening.
This Korean ground beef bowl checks every box for busy home cooks. It comes together in under 20 minutes, which means you can go from “what should I make for dinner” to “dinner is served” faster than you can decide what to watch on Netflix. The ingredients are budget-friendly — nothing exotic or hard to find. Ground beef tends to be one of the most affordable proteins at any grocery store, and the sauce uses basic pantry staples you likely already have.
But what really makes this recipe shine is how customizable it is. You control the spice level, the sweetness, the toppings. Maybe you want extra crunch from some cucumber slices. Perhaps you prefer your beef with a kick of heat. You get to call the shots, and that flexibility transforms this from “just another recipe” into something you’ll come back to again and again.
The family factor matters too. This isn’t one of those dishes where kids pick around the vegetables and push the plate away. The sweet-savory flavor profile appeals to almost everyone, and you can set out toppings so each person builds their bowl exactly how they want it. Expect seconds. Maybe thirds.
What Makes This Recipe Better Than Takeout?
Let’s be honest — sometimes you just want the convenience of calling someone else to cook for you. I get it. But here’s the thing about this Korean ground beef bowl: once you taste it, you might reconsider that takeout habit.
When you make this at home, you’re working with fresh ingredients. No mysterious additives, no preservatives to extend shelf life, nothing processed or artificial. You’re in control of every single component that goes into your meal. That alone makes a massive difference in how you feel after eating.
The sodium situation alone is worth mentioning. Restaurant Korean dishes often come with a salt content that makes your eyes widen when you think about it. You can adjust the soy sauce in this recipe to match your preferences — maybe start with less and add more to taste. Your heart will thank you.
And then there’s the immediate satisfaction factor. Takeout arrives, and you have to wait for it to cool down enough to eat without burning your tongue. With this recipe, you pull it off the stove and straight into your bowl. The beef stays juicy, the sauce clings to every grain of rice, and the textures remain exactly as they should be.
The cost savings add up quickly too. A single serving from a Korean restaurant typically runs $12-18, and that’s before extras like appetizers or drinks. This recipe? You’re looking at roughly $3-4 per serving when you make it at home. Over a month, that difference could buy you several nice dinners elsewhere.
Ingredients You Need for the Perfect Korean Ground Beef Bowl
Before you start cooking, gather everything you need. Having everything prepped and within reach makes the actual cooking part smooth and stress-free.
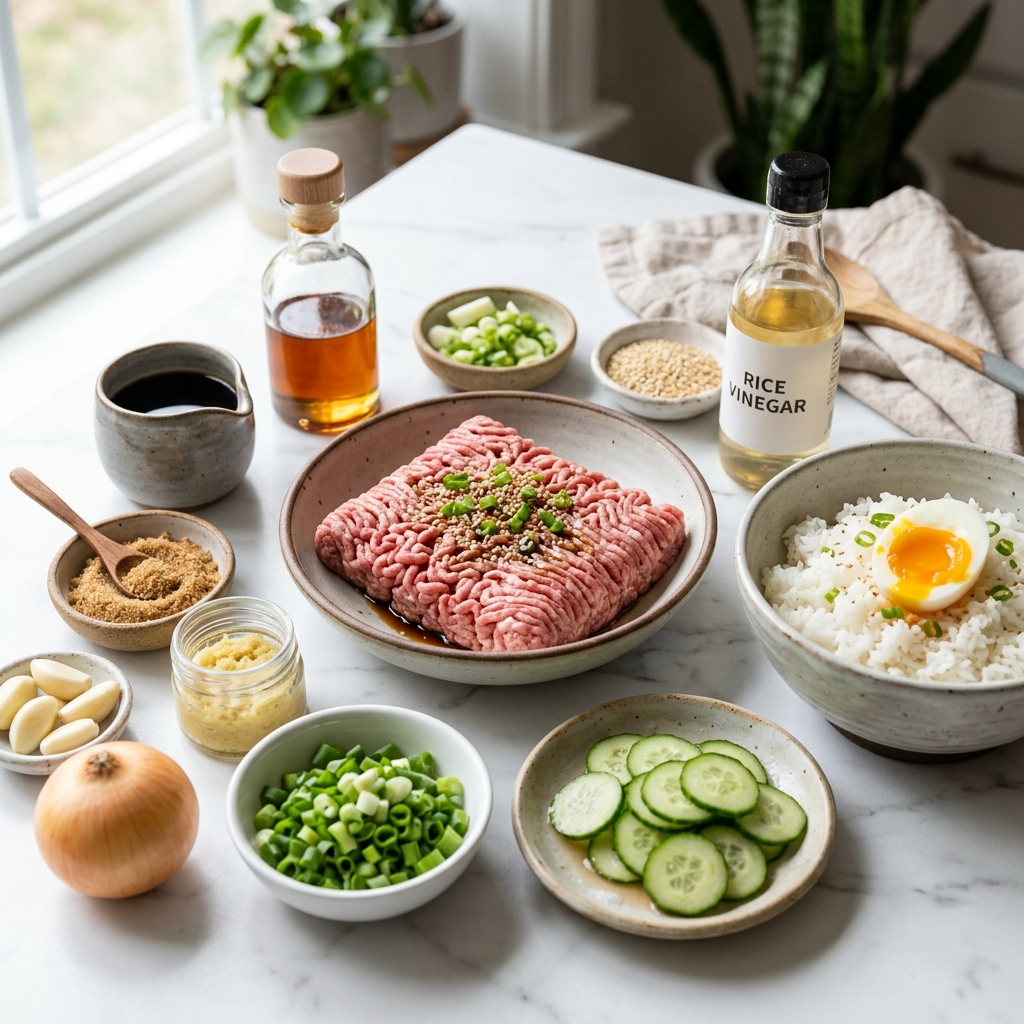
Beef and Aromatics
You’ll need one pound of ground beef. An 80/20 lean-to-fat ratio works best here — the fat adds moisture and flavor that leaner options can miss. Four garlic cloves, finely minced, and one tablespoon of freshly grated ginger round out the aromatics.
The Sauce
The sauce brings everything together, so don’t skip any component:
| Ingredient | Amount |
|---|---|
| Soy sauce | ¼ cup |
| Brown sugar | 2 tablespoons |
| Sesame oil | 1 tablespoon |
| Rice vinegar | 1 tablespoon |
| Black pepper | ½ teaspoon |
| Red pepper flakes | ¼ teaspoon |
The brown sugar balances the saltiness of the soy sauce with that caramelized sweetness you expect from Korean bulgogi. If you prefer, honey or coconut sugar work as substitutes.
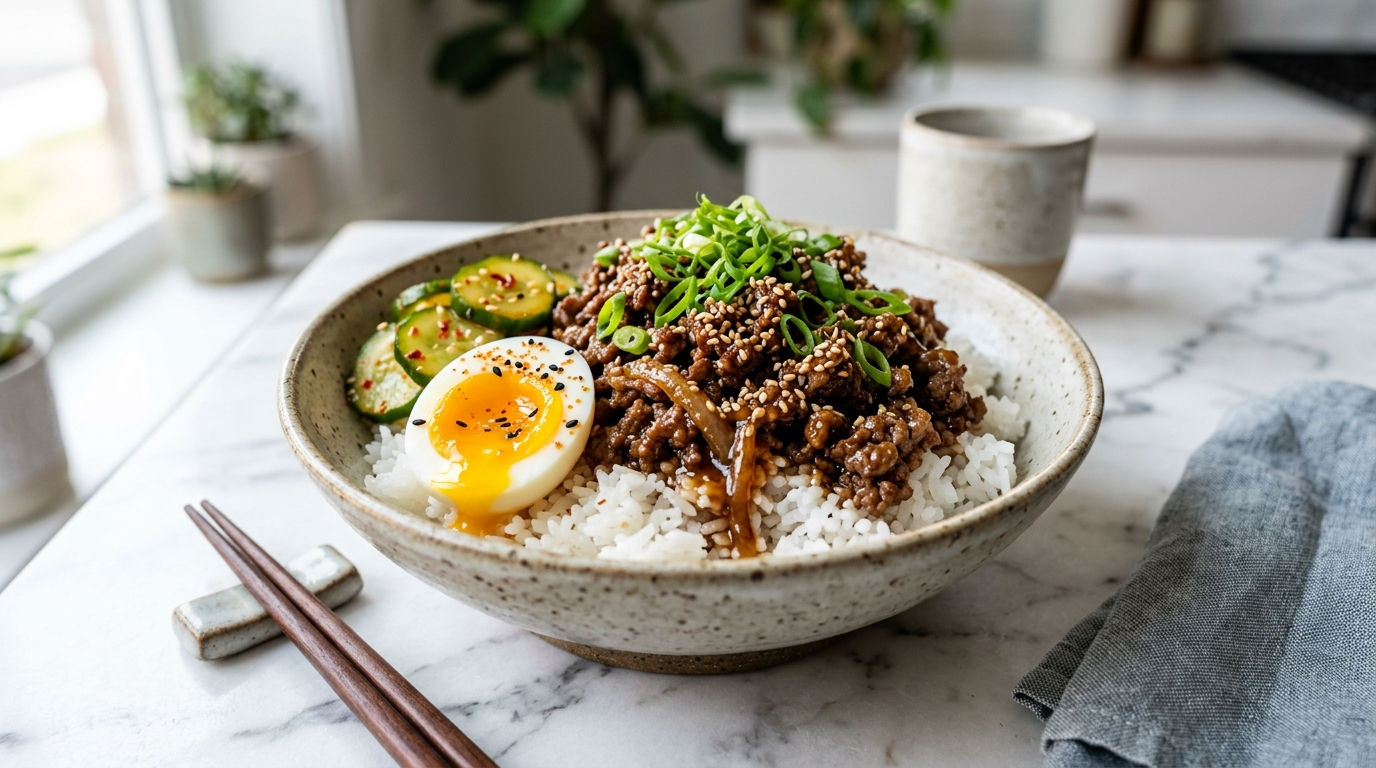
Toppings and Serving
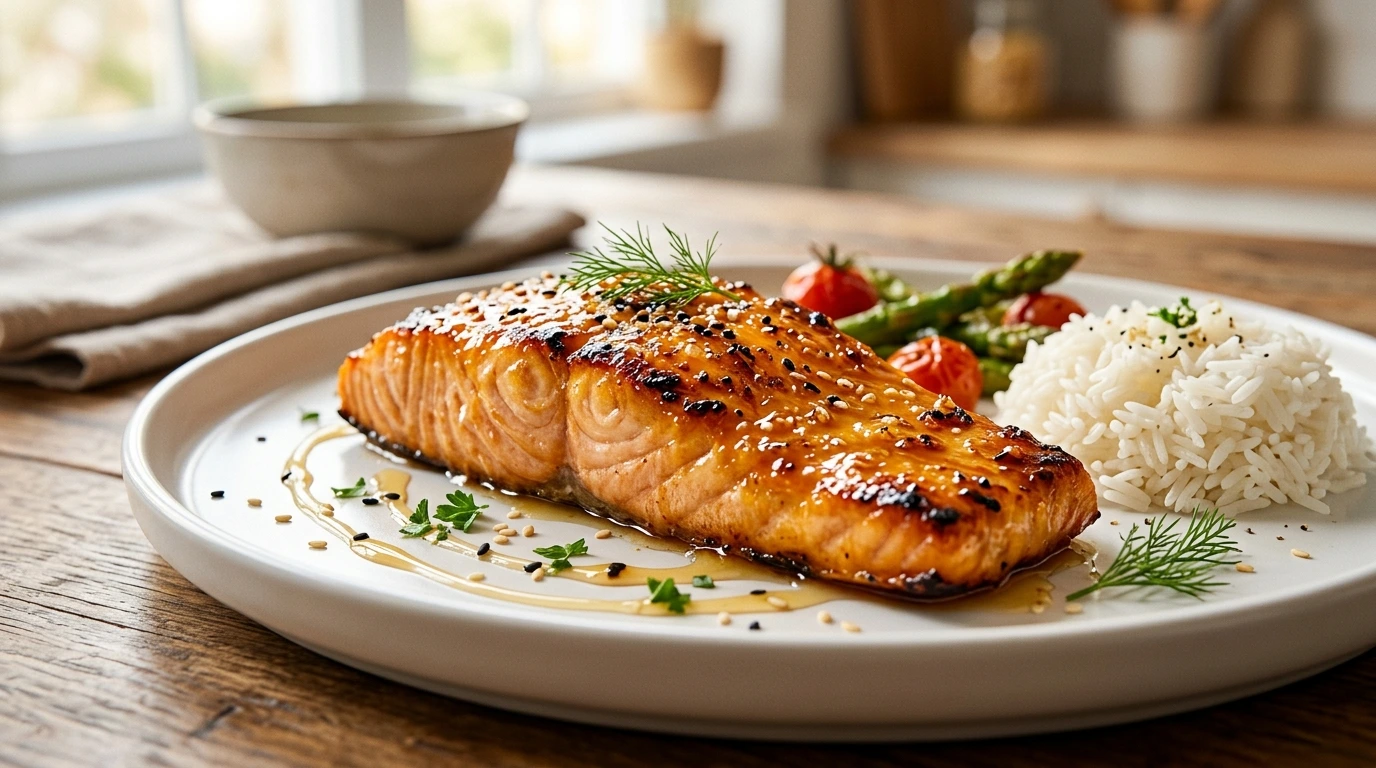
For serving, you’ll want cooked white or brown rice. The toppings are where you get creative:
- Sesame seeds
- Sliced green onions
- Kimchi (optional but highly recommended)
- Sliced cucumber
- Fried egg (optional)
Step-by-Step Instructions for Restaurant-Quality Korean Ground Beef
Let’s get cooking. Follow these steps closely, and you’ll have something worthy of a restaurant menu in your own kitchen.
Step 1: Make your sauce first. Grab a small bowl and whisk together the soy sauce, brown sugar, sesame oil, rice vinegar, black pepper, and red pepper flakes. Set it aside. This gives you time to focus on the cooking without juggling multiple tasks.
Step 2: Brown the beef. Heat a large skillet over medium-high heat. Add your ground beef, using a spatula to break it into chunks as it cooks. Let it develop a deep brown color before you stir — that caramelization builds flavor. This takes about 5-7 minutes. If you notice excessive liquid, drain some fat before moving forward, but keep a little for moisture.
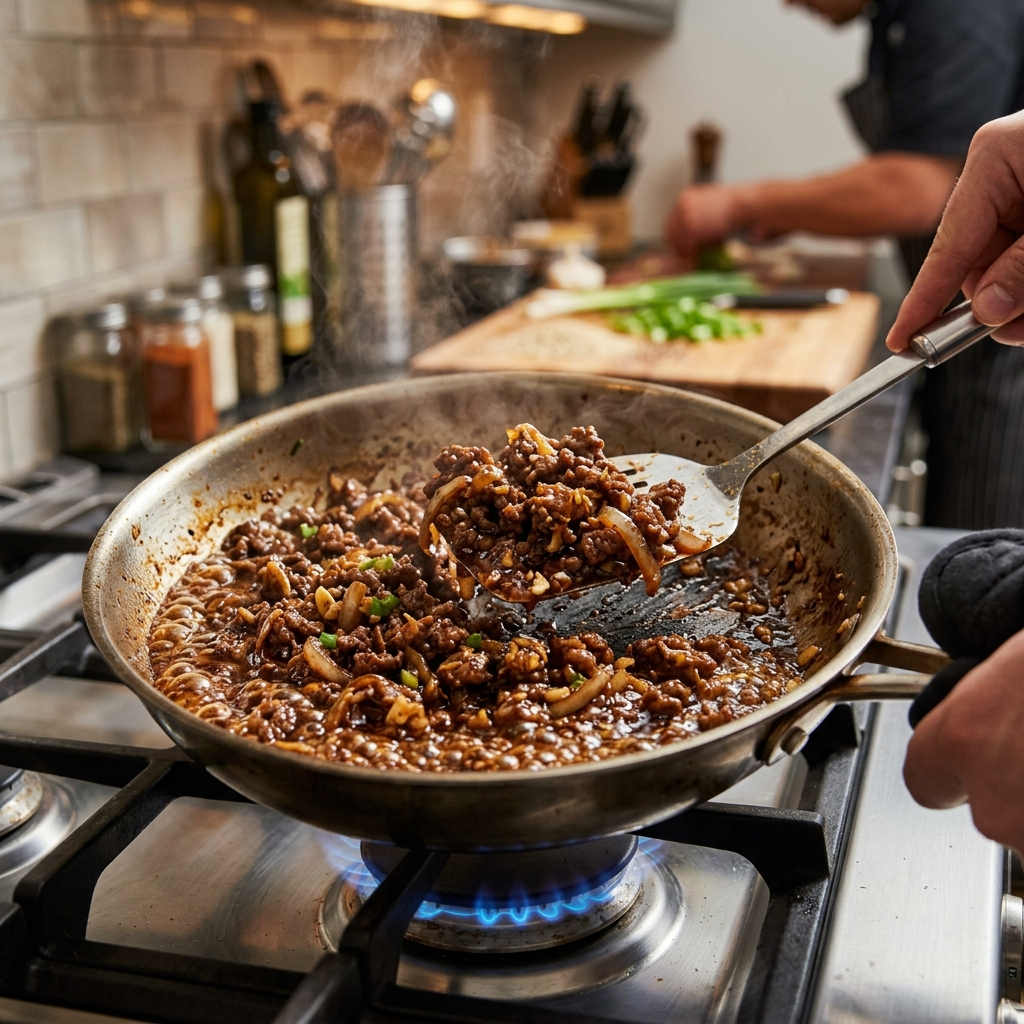
Step 3: Add aromatics. Push the beef to the edges of the pan and add your minced garlic and grated ginger to the center. Let them sizzle for about a minute until they release their fragrance. Then toss everything together so the garlic and ginger coat the beef.
Step 4: Simmer with sauce. Pour your prepared sauce over the beef. Watch it bubble up immediately. Reduce the heat to medium-low and let it simmer for 3-4 minutes. The sauce should thicken slightly and cling to the beef rather than pooling at the bottom of the pan. Stir occasionally to ensure even coating.
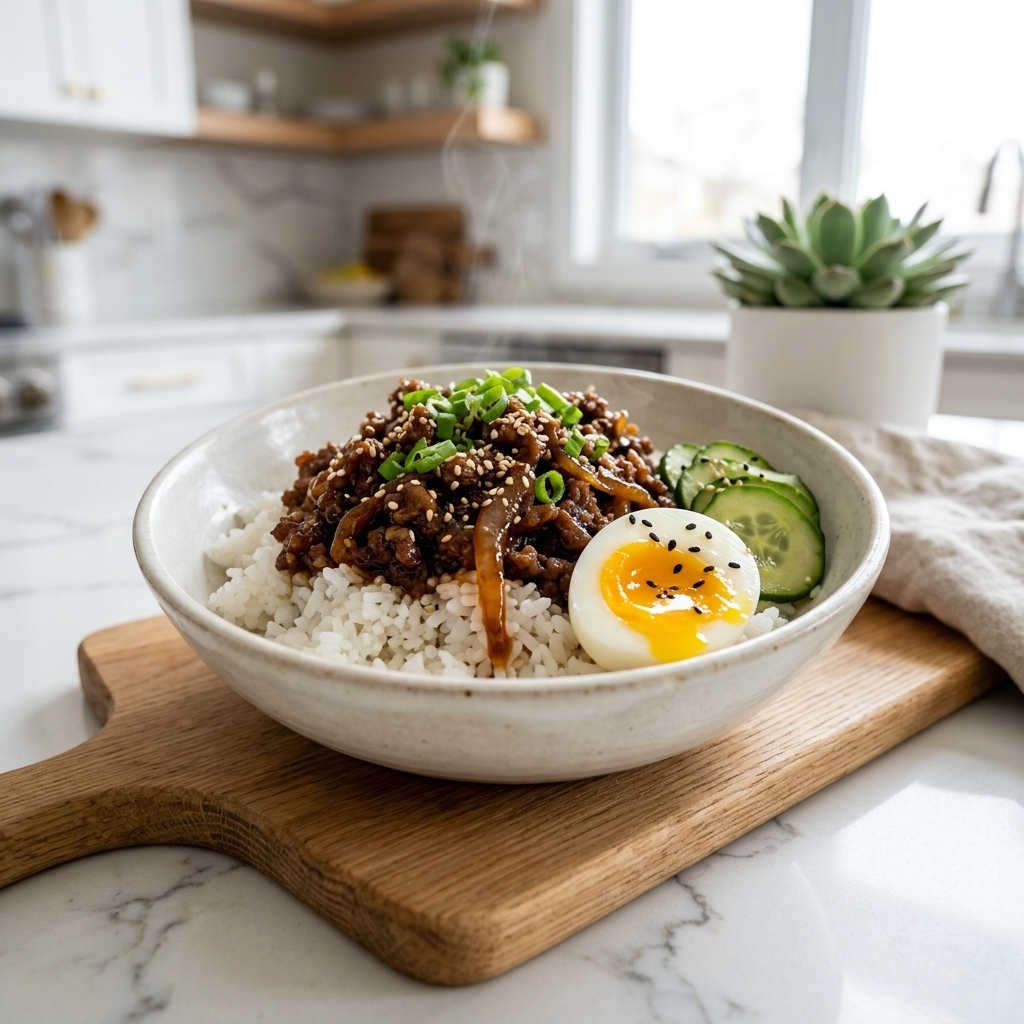
Step 5: Assemble your bowls. Spoon the beef over steamed rice, add your chosen toppings, and serve immediately while everything is hot and fresh.
Pro Tips for Perfect Texture
A few things separate good Korean ground beef from great Korean ground beef.
First, don’t cook the beef until it’s completely dry. You’re looking for browned but still juicy — the sauce adds moisture during the final cooking stage, so you don’t want to overdo it in the beginning. Second, let the sauce reduce properly. It should coat a spoon and cling to the meat, not sit as a thin liquid at the bottom of your bowl. Finally, if you want a slightly crispy edge on your beef, increase the heat for the last minute of cooking and let some pieces get a bit caramelized before adding the sauce.
Delicious Toppings & Variations to Customize Your Bowl
Here’s where you make this recipe your own. The base is incredible, but the toppings elevate it to something special.
Classic Toppings That Work Every Time
- Sliced cucumber — adds crunch and freshness
- Fried or poached egg — the yolk mixes with the sauce for an indulgent experience
- Sesame seeds — a little texture and nuttiness
- Sliced green onions — color and mild onion flavor
- Shredded lettuce — bulk and freshness
Want to Level Up?
Consider adding kimchi for that authentic Korean kick. Pickled vegetables work beautifully too, cutting through the richness of the beef with acidity. A drizzle of spicy mayo (mix regular mayo with sriracha) adds creaminess with heat. Avocado slices bring a buttery richness that pairs surprisingly well with the savory beef.
Protein Swaps
While ground beef is the star here, you can switch things up. Ground turkey or chicken creates a lighter version that still delivers plenty of flavor. Plant-based ground meat works if you’re avoiding animal proteins. For something more traditional, thinly sliced ribeye cooked quickly over high heat mimics authentic bulgogi more closely, though it costs more.
Nutritional Breakdown & Health Benefits
Understanding what you’re putting into your body helps you make informed choices. Here’s what you’re looking at with a typical serving:
| Nutrient | Amount per serving |
|---|---|
| Calories | 450-500 |
| Protein | 25-30 grams |
| Carbohydrates | 35-40 grams |
| Fat | 20-25 grams |
| Sodium | 600-700 mg |
This dish provides a solid protein punch, which supports muscle maintenance and keeps you feeling full longer. The iron from the beef aids energy production, while B vitamins support your metabolism. You can reduce sodium by using low-sodium soy sauce or coconut aminos if needed. The recipe also adapts easily for gluten-free diets by swapping regular soy sauce for tamari.
Frequently Asked Questions About Korean Ground Beef Bowls
What is a Korean ground beef bowl called?
This dish often goes by “Korean-style ground beef” or a deconstructed bulgogi bowl. Traditional bulgogi uses marinated thin slices of ribeye, but ground beef offers a quicker, more affordable alternative while keeping that signature sweet-savory profile.
Can I make Korean ground beef ahead of time?
Absolutely. Cook the beef as directed, let it cool, then store in an airtight container in your refrigerator for up to three days. When you’re ready to eat, reheat it in a skillet over medium heat until warmed through. The sauce may thicken in the fridge, so add a splash of water if needed when reheating.
Is this dish spicy?
The base recipe leans toward mildly sweet with just a hint of heat from the red pepper flakes. It registers low on the spice scale. If you want more kick, add extra red pepper flakes, a dash of sriracha, or go heavy on pickled jalapeños. You control the heat.
What can I use instead of soy sauce?
Coconut aminos offers a similar flavor profile with slightly less sodium and no gluten. Tamari works perfectly as a direct substitute and is also gluten-free. If you’re watching sodium specifically, look for reduced-sodium versions of whatever option you choose.
Can I freeze Korean ground beef?
Yes. After cooking and cooling completely, transfer to freezer-safe containers and freeze for up to three months. Thaw overnight in your refrigerator before reheating on the stovetop. The texture holds up well, though you might want to add a splash of water when reheating to restore moisture.
Serving Suggestions & Perfect Pairings
A great meal deserves great sides. Here’s what works beautifully alongside your Korean ground beef bowl.
Complementary Side Dishes:
- Korean cucumber salad (oi muchim) — that cool, slightly spicy crunch is perfect
- Steamed edamame — adds protein and satisfying texture
- Pickled radish — bright acidity cuts through the richness
- Miso soup — warming, light, and traditional
What to Drink:
If you’re in the mood for something special, Korean rice wine (soju) pairs wonderfully. For non-alcoholic options, sparkling water with a squeeze of lemon refreshes your palate between bites. Iced green tea also works beautifully.
Time to Make Your New Favorite Dinner
You now have everything you need to create a Korean ground beef bowl that rivals your favorite restaurant — in less time, for less money, and with ingredients you control.
This recipe adapts to whatever you have on hand, satisfies even the pickiest eaters at your table, and delivers that crave-worthy sweet-savory flavor you usually have to leave the house for. It’s the kind of dish that makes you feel accomplished in the kitchen without requiring culinary expertise.
So grab your skillet, measure out those ingredients, and get cooking tonight. Once you taste how easy it is to make restaurant-quality Korean food at home, you might just put that takeout app away for good.
We’d love to see how your bowl turns out! Drop a comment below with your favorite topping combination, share this recipe with friends who need a new weeknight dinner idea, or save it to your collection for that next time you’re staring at the fridge wondering what to make.


